Are you one of those people that peruses different fabrics with awe, wishing you could create your own designs by printing photos on fabric, but often fear that you lack the skills to do so? If this sounds like you, then don’t fret. I am here to tell you two things.
Firstly, you’re not alone. There are many of us. I myself was one of those people. I never put myself down as someone with the creative skills to put pictures on fabric and make something beautiful.
This leads me nicely into my second point – you do have the skills. I have the skills, you have the skills, your next-door-neighbor probably has the skills. It’s much easier than you might think to start printing photos on fabric. So in this post, I will explain how you can turn simple designs or photographs into stunning works of art, and put your pictures on fabric.
Printing photos on fabric
Step One – Prepare your image
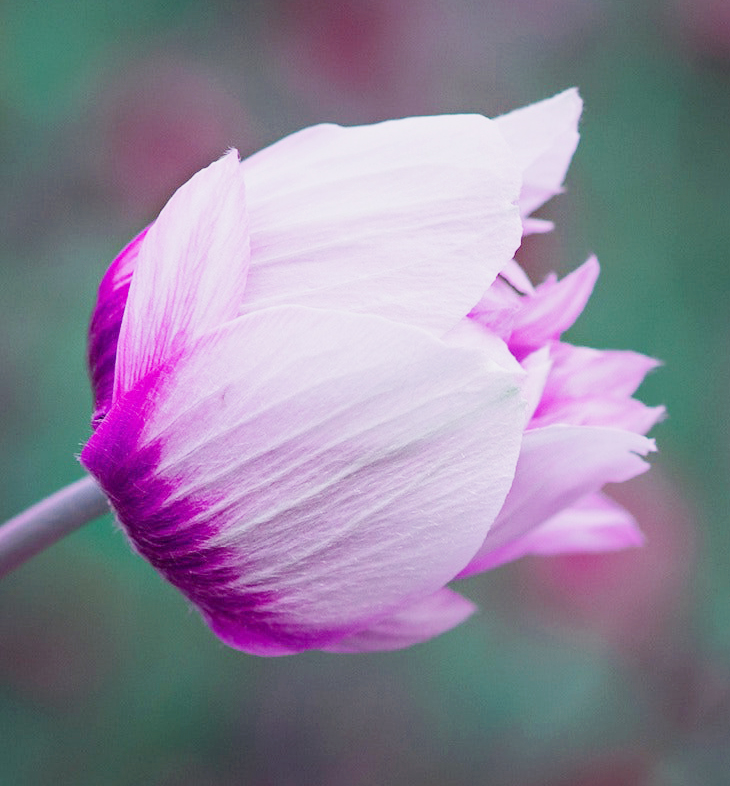
The first thing to do is to make sure you’re happy with the image that you’re using. I have chosen a photograph, but you can use a sketch, a doodle, a painting, or anything you like really. Looking at my photo I realized that it wouldn’t work as a print pattern for fabric as it stood. I decided to crop it down so that it was just the pink flower and some of the greenery behind it. This made it much more consistent. I didn’t use any fancy tools to crop it, in fact, I used the standard Windows Image Viewer. Once I was happy with it, I was ready to get started.
Step Two – Upload your image to the design tool
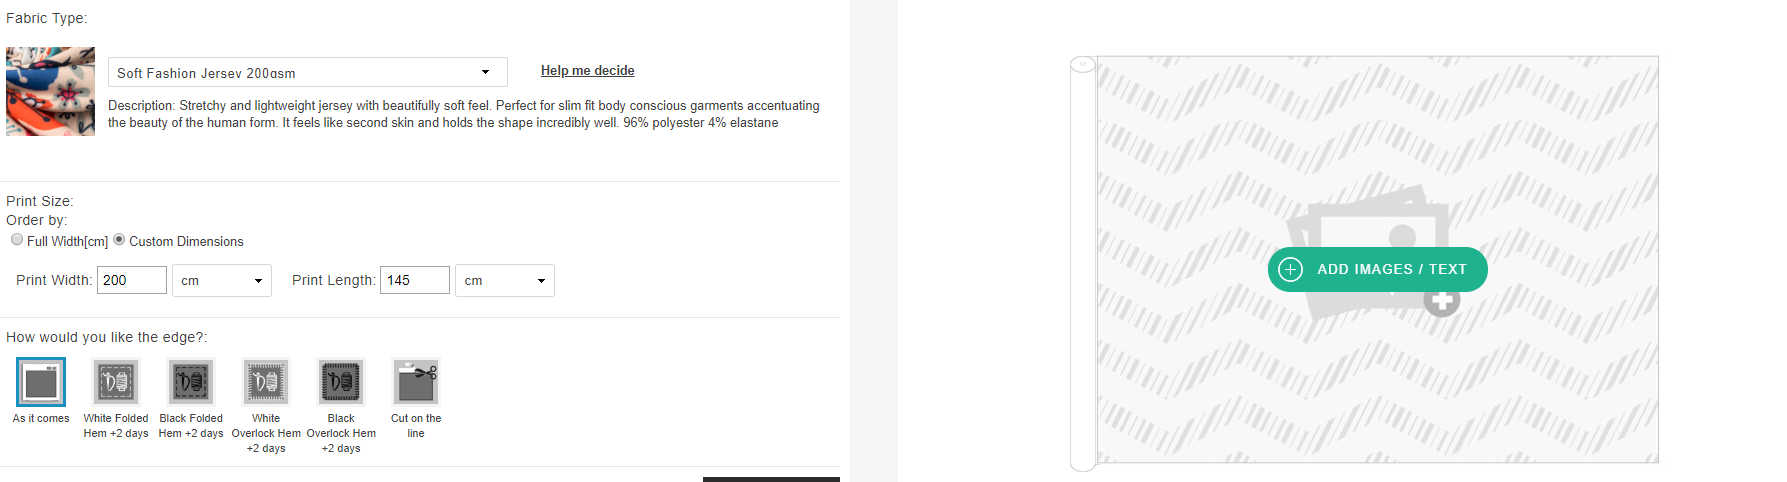
Next, I chose the fabric that I wanted my fabric patterns to be printed on. I chose Soft Fashion Jersey; a lightweight jersey with a super soft handle, perfect for making clothing. I selected the size that I wanted, and then pressed the ‘add images/text’ button that sits across the preview. This opened a secondary window which allowed me to browse my files on the device I was using, or even take an image from Facebook or Instagram. I navigated to the image that I had cropped and selected it to be uploaded, the system placed my pictures on fabric in the design template.
Step Three – Resize and re-position the image
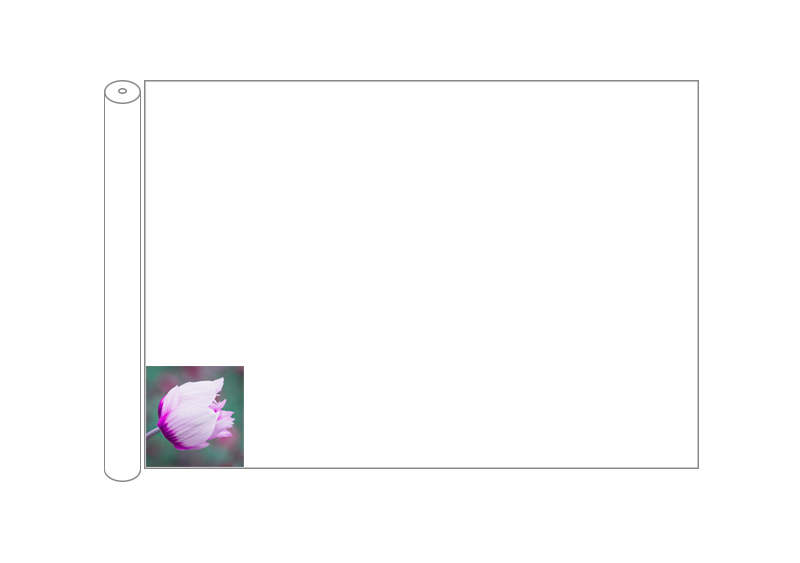
There are tools within the design interface when which allow you to resize your image, either one step at a time or to fill the entire space. You will also be able to make sure that the quality of your image is high enough to result in a good print. I knew I wanted to repeat my photo to create a floral design, so I shrank mine down and placed it along the left-hand edge of the fabric.
Step Four – Use pattern repeat
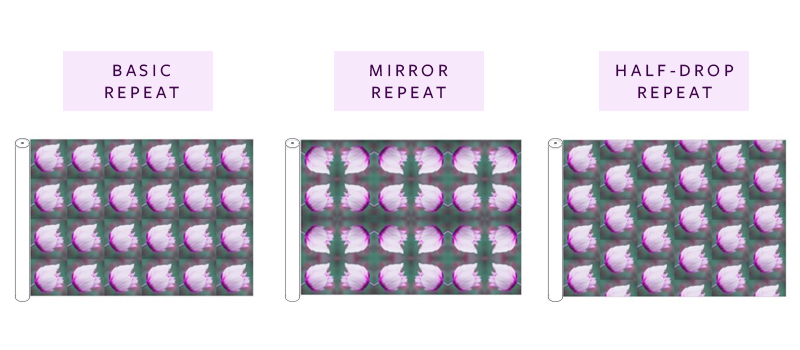
Next, you can repeat your design using our simple pattern repeat tool. There are three different repeat styles (four, if you include no-repeat). These each give you a different effect for your picture on fabric. Basic repeat simply tiles your image, like that of a noughts and crosses board. It gives you your design repeated one on top of each other, and side by side, across the whole of the space. Mirrored repeat will also lay the ’tiles’ of your image out the same way, however, it will mirror the image rather than duplicate it. I liked the way that this worked with my design as it gave me a cross/star shape between each of the flowers. The third and final repeat option is called a half-drop repeat. This changes the layout of the ’tiles’ by half-a-drop, giving more of a brick wall type effect.
Step Five – Place your order
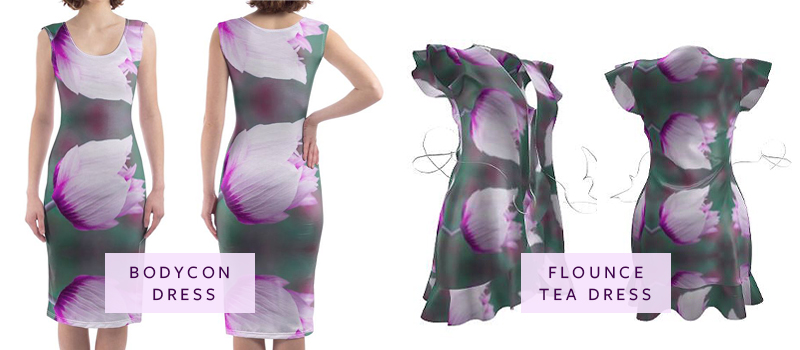
From here, you can place your order. As soon as you are happy with your design, proceed to the checkout and place your order. You are given the opportunity to preview your fabric, and you can also order test prints before you start printing photos on fabric if you aren’t ready to jump straight in. I was really pleased with how the design came out, so while I was feeling creative I also checked out how it would look on both a Flounce Tea Dress and a Bodycon Dress.
As simple as that
And there you have it. It really is as simple as that to start printing photos on fabric. In just five simple steps you can take a photograph, sketch, painting or digital drawing, and make it into beautiful fabrics. Why not give it a go yourself? We would love to see your designs!