Are you just starting to learn to sew?
Have you just recently started sewing and are in need of some tips to get started, or, more importantly, how to avoid those common sewing mistakes?
We’re sewing obsessed at Contrado. After all, we make everything by hand (and sewing machine), right here at our studio, and, over the years, we have worked with many sewers, some brand new and some seasoned professionals.
How to sew and avoid common sewing mistakes
When you are starting your sewing journey and just understanding how to sew, it is so easy to make sewing mistakes. Sometimes, it is the best way to learn. However, we want to help eradicate and correct these mistakes.
Just remember to practice, practice, practice and don’t give up if you do make a few errors. Practice makes perfect!
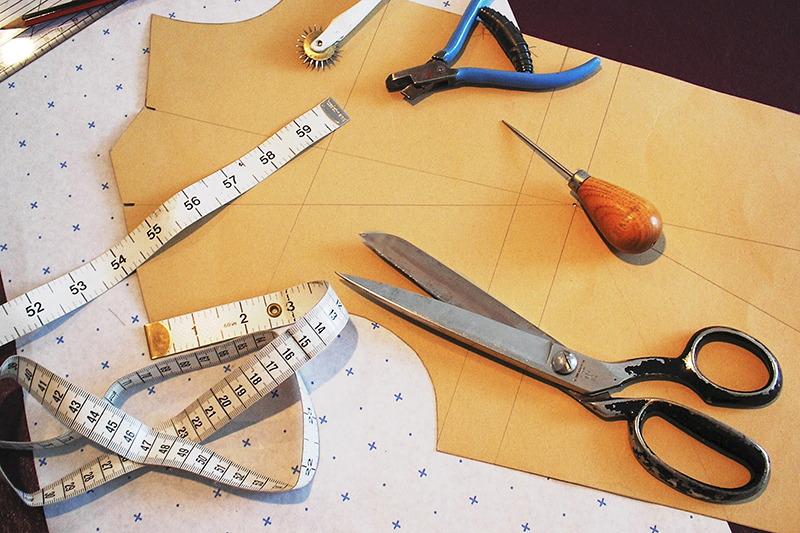
1. Measure twice, cut once
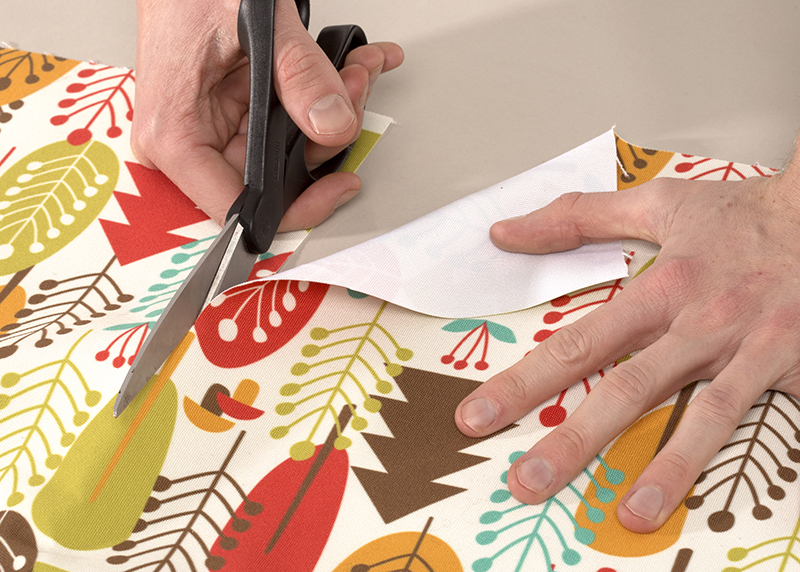
What is the mistake? Inaccurate cutting of your pattern.
Make sure you align accurately with fabric grain lines. Lay your cloth on a flat surface, like a clean floor. If you place your fabric on a table, make sure parts of it aren’t hanging over the edge, as this may pull it out of shape. If you need to cut on fold, ensure the fold is exactly on grain. Before you begin cutting make sure the pattern pieces are aligned with grain lines, then pin all around them. Inaccurate cutting is one of the worst beginner sewing mistakes. By following these steps, you can easily avoid it.
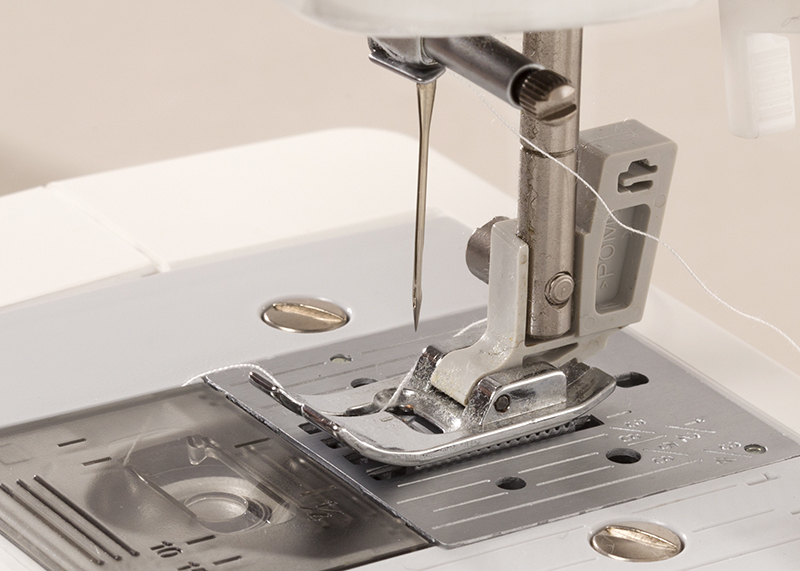
2. Use your presser foot
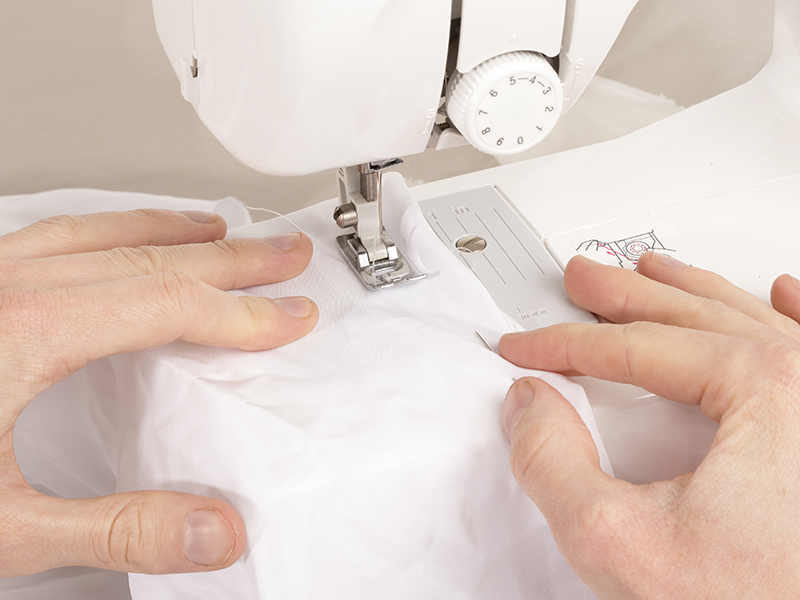
What is the mistake? Not using your presser foot properly.
The presser foot holds the fabric in place, so you can always stitch neatly, so make sure you use it. Forgetting to put the presser foot in the “down” position before you begin to sew will cause the material to jump around and it won’t “walk” backward easily; you may end being bunched up with your threads in a tangled mess! In addition, Natalie explains why the type of foot is an important choice for each project:
Natalie from Sew Hungry Hippie Natalie (www.hungryhippiesews.com) gave us the following tip;
“Use the right foot for the job. If putting in a zipper, it’s worth it times a million to use a zipper foot. It makes the task so much easier. The 5 or 10 minutes it takes to learn how to use the foot saves loads of time when actually doing the task at hand. Another example is when people try to use a regular foot when sewing vinyl or leather – it won’t move. You must use a Teflon non-stick foot so it can glide on the fabric. Worth every penny!”
3. Get the right tension and stitch length
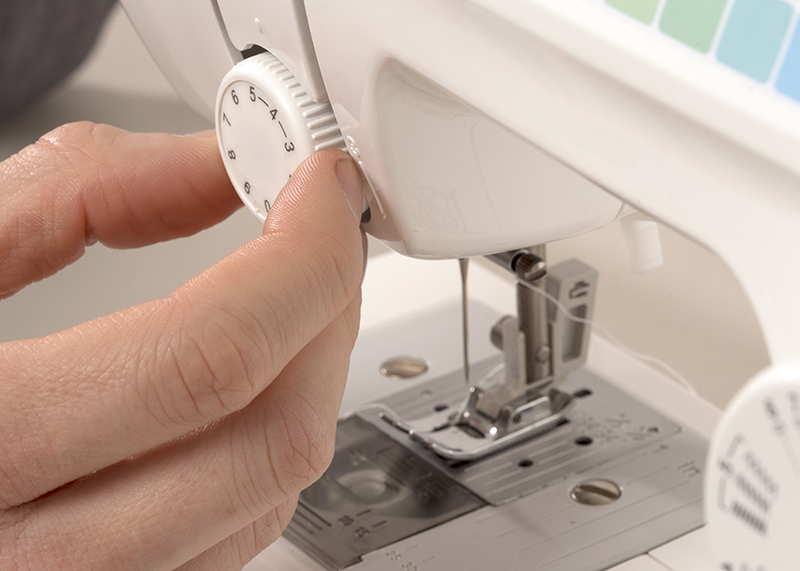
What is the mistake? Not checking your tension dial, your bobbin or regulating your stitch length.
Tensioning is a common complaint for sewers, and it is a tough skill to master, which even experienced sewers can struggle with. The tension dial does exactly what it says on the tin – it adjusts the tension on the spool of thread. Sometimes, when the stitching looks uneven or it is very tight on the top side, this can be a result of the thread tension. Before you begin fiddling with the tension settings make sure to check that your bobbin is properly threaded. To thread the bobbin into the bobbin case correctly, unspool thread in the correct direction (usually counterclockwise). You can sew test fabrics first to check if your tension is correct. The stitch can also be uneven if the stitch length regulator is off. We recommend taking note of your settings before you start trying to adjust different dials, and educating yourself on what each one does. Kristy can’t overstate the importance of this enough:
Kristy from Rock Baby Scissors Kristy(instagram.com/rockbabyscissors/) gave us the following tip: “Learn about stitch length! I didn’t in the beginning and some of my kids blankets look like a toddler topstitched them. I now know to use a lower stitch length when constructing a bag and a longer one when topstitching. The longer length looks more polished and gives your bag a nice, professional look while the smaller stitch length makes for tighter construction and less chance of ripping.”
4. Don’t forget about your seams
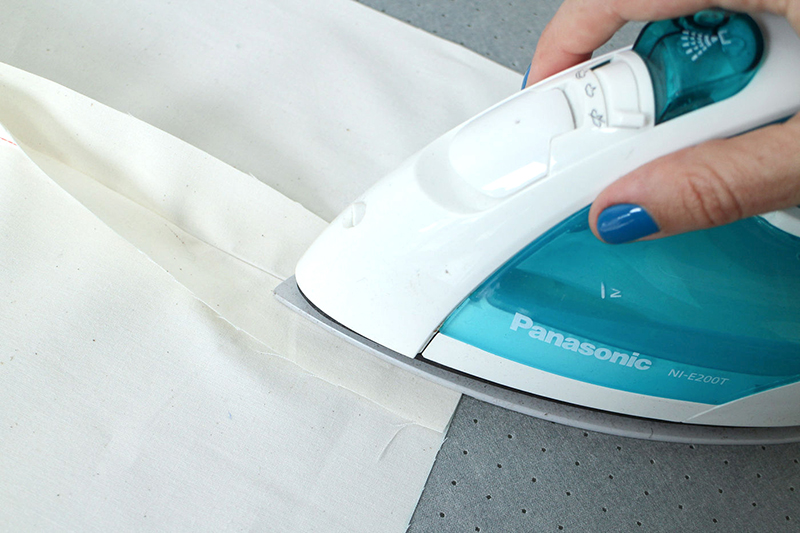
What is the mistake? Sewing your seams the wrong side up and not pressing them.
If you are sewing clothing, then knowing about seams is vital! When sewing seams, you’re constantly working on the inside of your garment, and reversing. Although this may be a tricky move, it is essential that you sew your seams on the right side.
When using patterned textiles, remember to place patterned sides facing each other, because when you reverse, they will end up on the outside. Try getting used to pressing your seams as you go, before joining seams and ironing your fabric before you get started. This will make your finished project look a lot more professional and reduces the risk of puckering. Bumpy fabric can also result in inaccurate cutting and sewing, which could all lead to a sewing disaster!
5. Gaping buttons
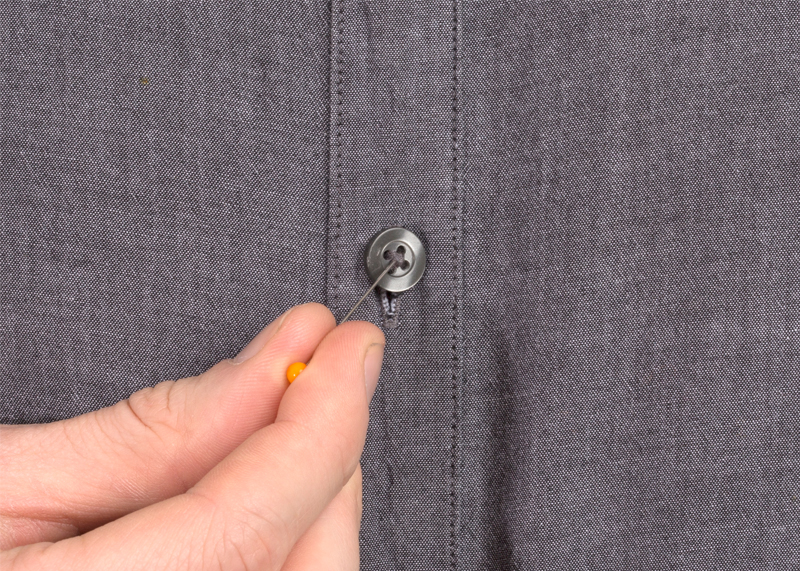
What is the mistake? Not measuring yourself to get accurate buttonhole placements.
Buttons and buttonholes can be a tricky skill to master. While patterns normally provide button placements, this should be treated as a guideline and not a one-size-fits-all measurement. Make sure to measure yourself and cater the buttons to your unique frame. A helpful tip for this is to measure the widest point of your bust and place a button there to avoid gapping. Then, place the rest of the buttons in reference to that one!
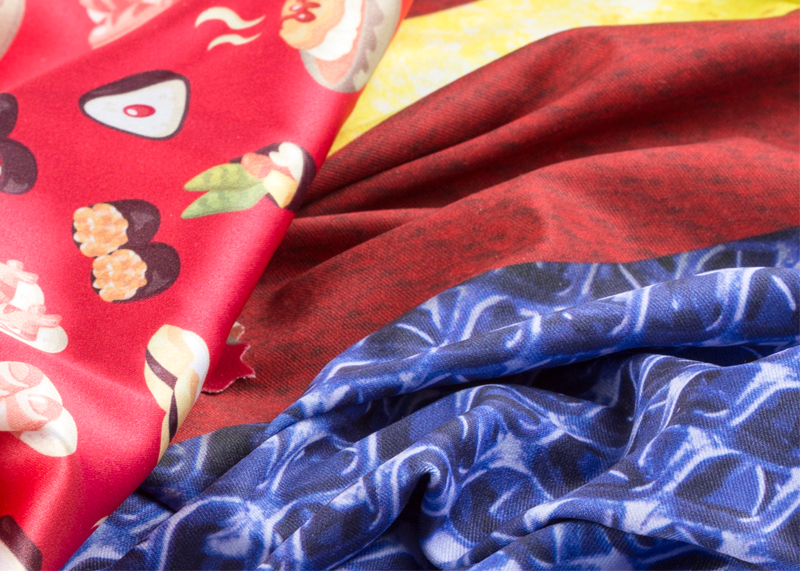
6. Get the right fabric for the job
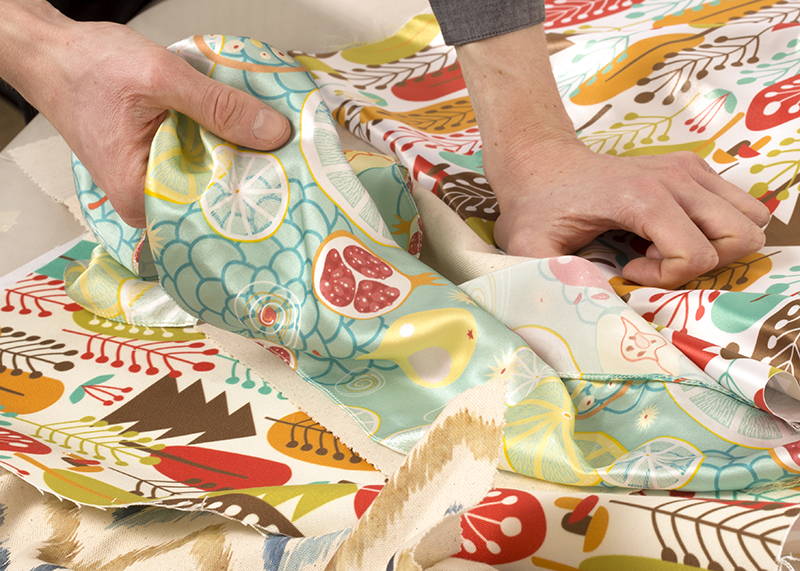
What is the mistake? Choosing the wrong fabric for your project.
Don’t get sidetracked by the pretty, colorful fabrics, if they are not the right textiles for the job at hand! It can be very easy to be persuaded to use a certain textile, thanks to its color, pattern, or style. Most patterns have suggested fabrics, which have been carefully chosen to best suit the structure of the finished garment. By choosing a fabric based on its aesthetics alone, you might not be able to complete your project. Laura breaks down her ways of choosing the right fabric:
Laura from The Skirt Boss Laura(https://thepatternboss.wordpress.com/) gave us the following tip: “Choosing the wrong fabric may result in feeling overwhelmed. In the past, I would feel as if I wasted time and energy, only to have my garment look terrible…all because of my fabric choice! I rarely have that issue now. Here are my 4 tips. First, when sewing a commercial pattern, I always look at the suggested fabrics listed on the back of the envelope. Those fabrics are sure to look great. Second, I make it a point to try and sew new fabrics as often as possible. When I manipulate new fabrics, I learn how the material behaves. It is also essential to research which needle-type works best. Third, if I do make something that does not drape well, I laugh it off and try again. Pull out your seam ripper, tear the garment apart, and use the fabric to make something else. The more you sew fabrics, the better you will get at choosing the right one. Last and fourth, I use “balance” when it comes to prints and solids. If my outfit has a lot of detail, I always choose a solid color fabric. If my outfit is simple, then I select a printed fabric. If not, then the finished product may look too busy. Balance is always key.“
7. Check your needle and thread
What is the mistake? Choosing the wrong type of needle and thread.
When making most kinds of garments, you should use a 100% polyester, all-purpose thread. Make sure you check the label, as certain threads, such as rayon, silk and quilting thread are not appropriate for garment construction. Universal needles are mostly used for sewing natural fibers, while ballpoint or jersey needles are best for sewing with knits.
There are needles designed for stretchy fabrics, such as stretch needles, but also specialty needles for materials such as metallic and leather. Ensure you match the needle to the weight of the cloth and check the intended purpose before starting your project. While we are on the subject of needles, remember to make sure the needle in your sewing machine is changed regularly. It is recommended that sewing machine needles should only be used for 6 – 8 hours of sewing time, before being replaced by a fresh one. This will ensure a smooth and more accurate finish.
8. Learn how to read a sewing pattern
What is the mistake? Not being able to understand a sewing pattern and sewing terminology.
When you are following a pattern, it is important to remember that every single mark, symbol, and label on the pattern is there for a reason, and they all mean something. Phrases such as; the grainline, fold lines, finishes measurements, etc., all mean something and we recommend reading up about sewing terms before getting started on your project. Reading through the instructions can help give context to these terms and paint a fuller picture of constructing the garment. Education is key, so if there is anything you don’t understand, look it up or ask someone with more sewing experience. Staci explained to us the importance of instructions:
Staci from Crafty Staci (craftystaci.com) gave us the following tip: “The best advice I can give when it comes to traditional sewing techniques is to read the instructions, all of them, before starting any project. Whether you’re brand new and learning how to make basic projects, or you’re more experienced and you’re tackling a designer pattern, those instructions are invaluable. Reading the instructions, start to finish, before beginning can influence the way you handle certain parts of the process. For instance, you might be making a bag and realize you’d like the handles spaced differently than shown in the pattern. That might work out fine, but you can’t be sure unless you know the steps that follow and that it won’t interfere with the construction of the rest of the bag. Seeing the whole picture before you begin allows you to let your own creativity shine, and gives you a more successful result!”
9. Have plenty of fabric at hand
What is the mistake? Not having enough fabric in case of errors.
Especially as a beginner, it can be very easy to make an error or mistake while trying to cut out a pattern. These mistakes always lead to you having to discard that piece of fabric. When you buy the material for your sewing project, buy a bit extra, to cover these kinds of errors. Some fabrics tend to shrink in the wash, so by having some extra material, all your bases are covered. Nateida provided us with why this is so crucial:
Nateida from Sew Natural Dane (Instagram and Youtube: SewNaturalDane) gave us the following tip: “It’s very important to ensure you have the right amount of fabric for your upcoming sewing project. I am plus size, so this is very critical for me when considering the type of project I’m working on, especially if it’s a dress. I highly recommend measuring all of your pattern pieces and combining those measurements to determine the amount of fabric you will need. If you like wearing circle skirts, be sure to either always choose a 58″-60″ wide fabric or purchase enough fabric that you can create panels to accommodate the skirt pattern pieces This will also be critical if your bodice piece has wrap pieces or sashes; you definitely want to make sure you have enough fabric to self line as necessary. This tip has saved me plenty of frustration on many projects.”
10. Fabric preparation is key
What is the mistake? Not prepping your fabric correctly.
Prepping your fabric before you embark on your project is a necessity! Some textiles need to be washed or even dry cleaned before they can be used. For example, denim needs to be machine washed but wool needs to be dry cleaned. Some fabrics can shrink after washing them, and if you haven’t prepared for it, then your garment will not fit properly when it is made. Sewing disaster!
11. Keep it simple to start with

What is the mistake? Choosing an overly complicated pattern when you are a sewing newbie.
Before hitting the big-league patterns and projects, it is imperative to master stitching straight and stitching accurately on woven textiles. Great simple sewing projects to start with can be tops, floaty skirts, underwear and tunic tops. While we are at it, we also recommend just sticking to one project at a time. Make and finish each project as you go. Along the way of each one, you will learn, and make mistakes, which you can avoid in your next project.
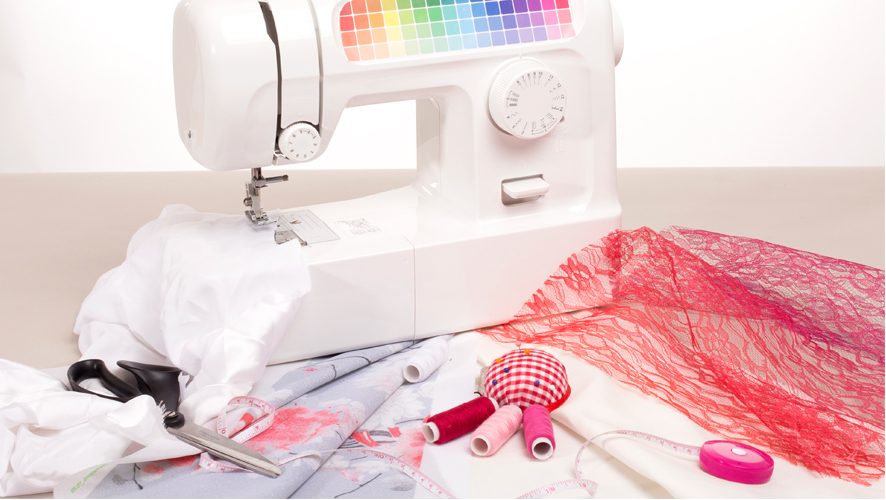
12. Use the right tools
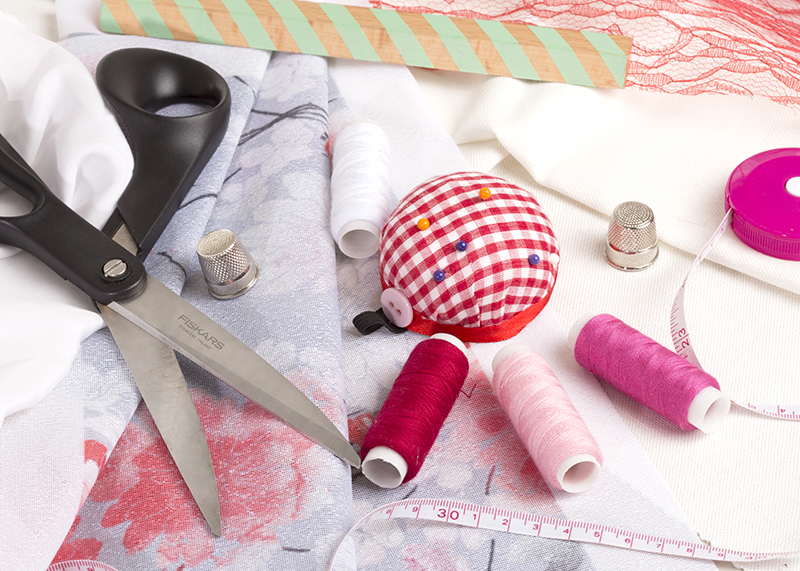
What is the mistake? Using the wrong sewing tools for your project.
Simple sewing mistakes can easily be avoided by using the correct tools. We have looked at the importance of using the correct needles and thread, but it goes beyond that.
Scissors. There is a world of difference between kitchen scissors and sewing appropriate scissors. Not all scissors are created equal! You need good quality SHARP scissors to cut your fabric. Never use your regular household scissors, that you use to cut paper, packaging etc, to cut your material. This will blunt your blade significantly. Keep sewing scissors sharp and well-maintained so they can chop through fabric smoothly. Also, don’t use scissors to rip out a seam. Try using a seam ripper instead since they are made specifically for this purpose. They are quicker and better than scissors and will prevent your fabric from ripping.
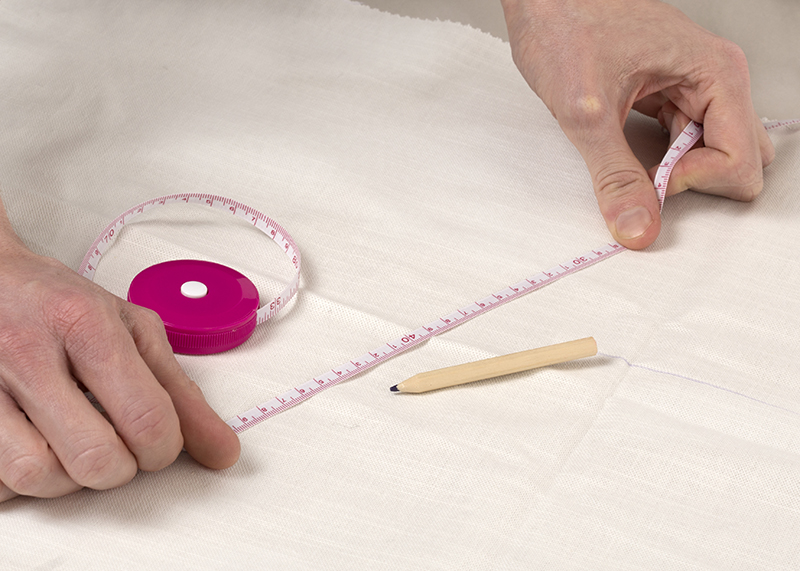
13. Know your measurements

What is the mistake? Not knowing your measurements when making clothes for yourself.
No, we’re not talking about the standard store sizes, we mean YOUR actual body measurements. By knowing the exact measurements of the body you are sewing for, you will avoid a lot of heartache and annoyance at the completed project, if it doesn’t measure up.
Now you are completely informed on sewing, why not try all different kinds of fabrics in your own swatch pack?

Loved this post.
This is so chock full of useful information for a beginner.
Hi Evelyn! We’re so happy you found this useful! Best of luck on your upcoming sewing projects, we hope these tips make them seamless. 🙂
This is a very helpful post, I will make sure to purchase a jersey needle as I like to sew with a lot of old t-shirts.
And who knew there was such a thing as a Teflon presser foot?!!
Hey Clair, I’m so happy you found our post helpful! Jersey needles are really the best! Teflon presser foots will really change your life too, I highly recommend. Best of luck on your sewing endeavors. 🙂
I actually just ran in to not enough ‘fabrics! I am working on a dress that has a bunch of trim and it said 5 yards of trim. I have attached it all and it is 2 yards short of what I need!