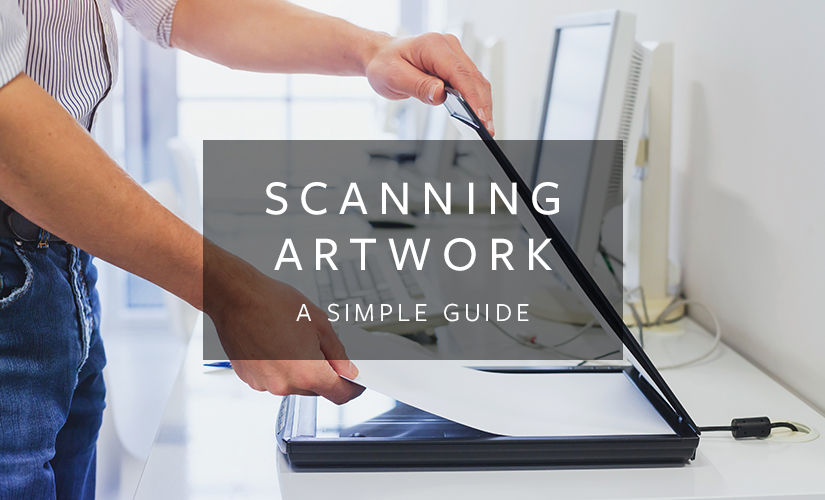
Throughout the Contrado website, you are likely to find multiple references to uploading your artwork or designs to our design interface. You may be wondering what does this actually mean? If your piece is a painting in your studio, how do you even make it a file on your computer to upload, let alone a high-quality one? Enter a technology advancement, the scanner. Usually, people think of scanners as just flappy bits at the top of their printer that they might occasionally use to scan their passport, drivers license, or proof of address to send off for some kind of insurance or application; however, things have come a long way since the birth of the scanner, so we’re here to discuss how you can use the scanner to scan your artwork on your own.
Why is scanning artwork important?
If you want to print your artwork onto any of the selected fabrics, clothing, or homeware on the Contrado website, then you’ll need a digital version of your artwork. If you simply take a photo and upload it, you aren’t going to get a high enough resolution image for digital print. Check out our handy tips for buying a scanner specifically for scanning artwork below, and start printing your artwork on Contrado’s products.
Scanning Artwork – Buying a scanner
There are a large number of scanners in the market. They range in price, quite dramatically. A quick online search shows that they start at around $15.77 and go up to as much as $26,300. So, with that many choices, how do you know which one to purchase?
There are two different types of scanners, and by this, we mean two scanner technologies. CIS and CCD. There are major differences between the two – so which is the best for scanning artwork?

CIS Scanners
CIS scanners use a technology called contact image sensors. This is somewhat self-explanatory. The print or artwork being scanned needs to be in contact with the pane of the scanner for it to pick it up. That’s why when you scan your passport you end up with dark lines and shadows where the centerfold is.
CCD Scanners
CCD stands for charge-coupled device, which is much less self-explanatory to say the least. This type of scanner uses mirrors to bounce light to a sensor, which remains stationary. In simple terms, a CCD scanner works very similarly to the way that a digital camera does.
So, which is best for scanning artwork?
Well, to be frank, that depends on the type of art. If you’re an illustrator or an animator, then a CIS scanner would be sufficient, as your pieces are likely to be flat. As long as there are no creases in your artwork, then it should scan just fine.
For scanning artwork with a little more texture to it, such as paintings, especially with acrylics, or even sketches that are held within a sketchpad, then a CCD scanner is the way to go. They are a little more expensive, starting at around the $66 price point, but will get a much better scan, especially when the work isn’t a completely flat piece.
Other important considerations for scanning artwork
It’s not just the type of scanner that you need to consider, or the budget when you are buying equipment for scanning artwork. There are a number of other factors – file format, color systems, and resolution. It may all appear a little overwhelming with the facts and figures that are thrown at you, but as long as you know what to look out for, then you should find buying a scanner much less daunting.

File Formats
For years, the most popular file format for saving images has been JPEG (pronounced jay-peg). A lot of digital cameras use this file format along with various computer software. Other common formats are bitmap (.bmp), Paint (the one that comes on your computer as standard in the accessories folder, usually saves the image in this file format by default), and Portable Network Graphics (.png – pronounced as ping). Another file format that is becoming more popular is the TIFF (tagged image file format) file. Some software uses its own file format such as Photoshop uses .psd, Adobe Illustrator uses .ai, and there are so many different file formats and extensions; not all file formats and extensions are compatible with all software.
So, which to use? In most cases, a JPEG will do, but sometimes there is a loss of quality with this file format. The loss of quality can occur when you first save it, or when you open, edit and then resave it. For scanning artwork, editing, and ultimately printing your pieces, TIFF is a fantastic option. It can be saved and stored in a lossless format, and it uses the CMYK color system, which I’ll explain in a moment. Both JPEG and TIFF are universal file formats.

Color Systems
So, this topic is a tricky one, because we have been taught different things about colors throughout our lives. To begin with, we are taught all the colors of the rainbow, and then we learn about browns and greys and golds. Then we are taught about primary colors and how they all go on to make up other colors. Later in life, things change again. We learn about the primary colors of light – red, green, and blue.
RGB
RGB is the term we use for the aforementioned red, green, and blue. They are the primary colors of light that are most commonly used in things like computer monitors, digital cameras, and televisions. The colors are shown in varying proportions and will then display a different shade or color on the screen.
CMYK
The second term that you are likely to come across is CMYK. This refers to the primary colors of pigment. Needless to say, this is most commonly used in printing, whether that be fabric printing or standard from-your-computer-onto-paper printing. This stands for cyan, magenta, yellow, and key. Cyan is a shade of blue, magenta is pink, yellow is, well, yellow of course, and key refers to black. ( ‘Key’ is a shortened term for the printing term ‘key plate’. The key plate impresses the artistic detail of an image, and this is usually done in black ink. A much simpler explanation that has often been considered is because black, and no other color begins with ‘K’.)

DPI
DPI stands for dots per inch, and it is self-explanatory. It’s important when scanning artwork to ensure the file (before any editing) has a good DPI. Aim for at least 300DPI when scanning.

Say this is an inch of your artwork. You scan it at 9DPI. That means that within the inch there are nine dots used that make up that little part of your image. Kind of like a mosaic when you think about it. If your piece is one foot squared (12 x 12 inches), then it will be made up of 108 little dots of varying colors to make your picture. 108 mosaic tiles, if you will.

This is also an inch of your artwork. Although this has been scanned at 36DPI, for every square inch of your art, 36 little dots make up that image. This is obviously going to be much more detailed. It’s harder to tell in these examples as they are black, but it will make things like color changes appear smoother, as well as fine lines and curves. For the same 12 x 12-inch piece of art, you’d have 432 dots – or 432 mosaic tiles. Much more detailed.

So, what happens when you use software to increase the DPI? Put simply, the computer doesn’t know what color to make the extra dots that it’s adding. See the original nine black dots? They go white at the edges, so when the ‘artificial’ dots are added in-between, it just takes a guess at what color it should be. Here it mixes the black and the white, ending up with grey.
Don’t scan something in at 100DPI, and then use software to upscale to 300DPI. 100DPI will likely make your image appear pixelated or blurry, and increasing it with software will cause distortion. This is because the computer doesn’t know what to put in those other dots.
Scanning Artwork – In summary
Now that we have all of this information, we can consider it all carefully when buying equipment for scanning artwork. To summarize, here is what we have found:
- CIS scanners only really work for flat mediums but have a lower outset cost
- CCD scanners are more expensive but better for textured work
- JPEG files experience some loss however are universal and mostly fine for print purposes.
- JPEGs use RGB, so the colors will be displayed the same on all screens, but may print differently
- TIFF files are lossless and are also pretty much universal
- TIFFs use CMYK so the colors will be true to print, but may look different on some screens
- The higher the DPI that your scanner will scan in, the clearer the image will be
- Where possible, avoid upscaling your scans using computer software
When your images are in a digital file format you can easily upload them onto a variety of fabrics, garments, and homeware items across the Contrado website.